

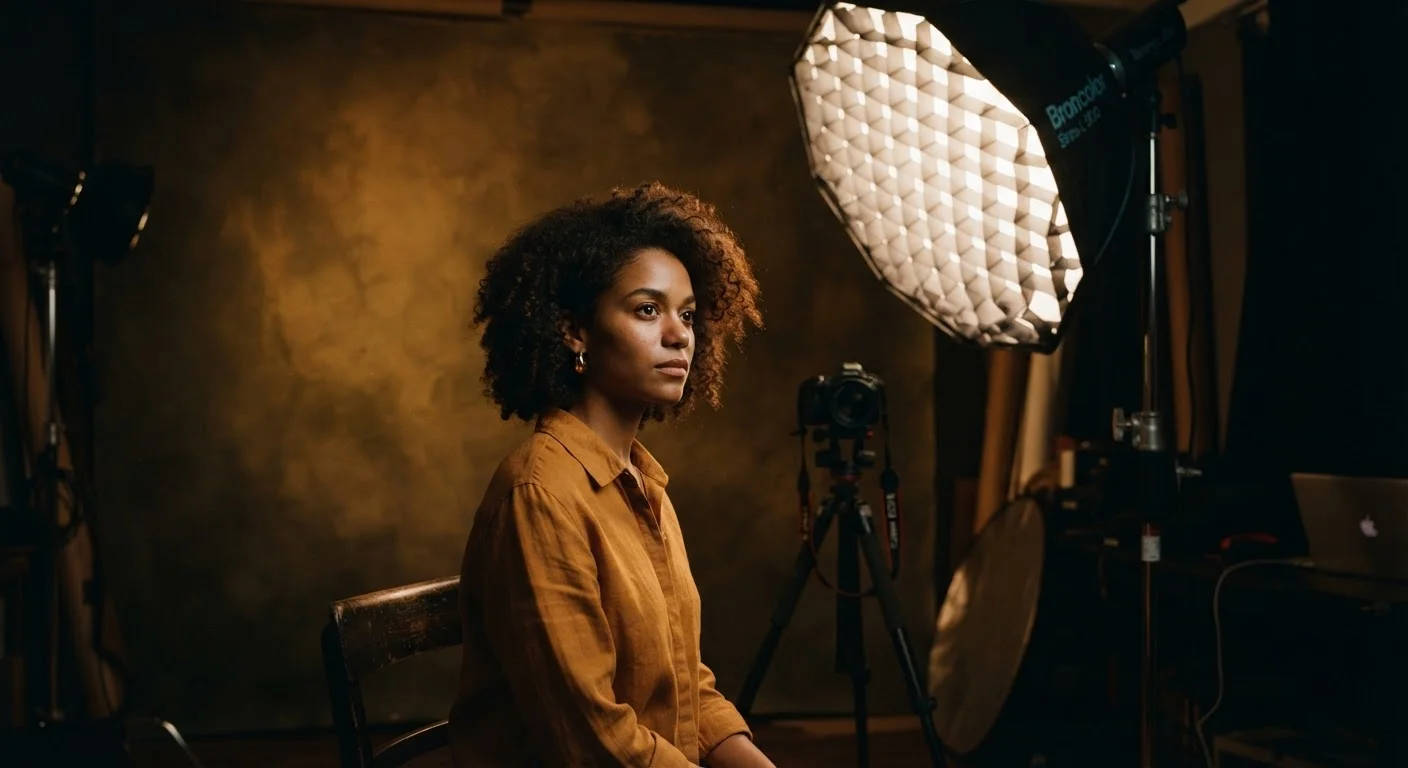
Key Takeaways
Why Light Is the Real Subject of Every Photo
Photography is, at its most literal, the recording of light. The word itself comes from the Greek for "light writing." Yet most conversations about photography focus on cameras, lenses, and editing software - tools that matter far less than understanding the light already present in any scene.
Professional photographers think about light before they think about anything else. They read a location the way a musician reads a room, asking: Where is the light coming from? How hard or soft is it? What color is it? These three variables - direction, quality, and color - form the foundation of virtually every lighting decision made in both studio work and natural-light photography. For a broader look at how all these elements work together, see the complete guide to photography as a visual art.
Direction: Where Light Falls Changes Everything
Shadows create the perception of three-dimensional form in a two-dimensional image. Light direction controls where those shadows land - and that changes how a viewer reads the subject entirely.
Study light direction before touching camera settings.
Direction is the first and most consequential lighting variable. Identifying the angle of your light source before adjusting exposure or composition helps you make intentional decisions about shadow placement and depth.
Modify effective source size to control shadow softness.
Because softness is determined by source size relative to the subject, moving a light source closer or adding diffusion material changes the mood of the entire image without altering the overall exposure significantly.
Use a reflector or second light to manage lighting ratio deliberately.
The contrast between lit and shadowed areas defines the tonal mood of an image. Controlling the fill - even with a simple white foam board - gives the photographer authority over that contrast rather than leaving it to chance.
Set white balance intentionally rather than leaving it on automatic.
Auto white balance tends to neutralize color casts that a photographer might actually want to preserve. Choosing a fixed white balance setting - or shooting in RAW format and deciding in post - keeps color temperature as a creative tool.
Learn to read and use backlight for subject separation.
Backlight, when exposed for properly, creates a rim or halo of light around a subject that visually lifts it away from the background - a technique widely used in portraiture and product photography.
Front lighting (when the source sits behind the camera) flattens a face; side lighting sculpts it. Backlighting separates a subject from its background, creating a halo effect prized in portraiture. Underlighting - a source coming from below - reads as unnatural to human eyes because we almost never encounter light that travels upward in everyday life, which is why it reads as menacing in horror films.
The same principles apply whether a photographer is working with a studio strobe, a window, or open sky. Understanding direction means understanding what kind of depth and drama the image needs before pressing the shutter.
Quality: Hard Light, Soft Light, and the Source Size Rule
"Hard" and "soft" light refer to the sharpness of the edge where shadow meets highlight. Hard light produces crisp, defined shadow edges. Soft light produces gradual transitions that feel gentler on the eye.
The governing principle here is simple: the larger the light source relative to the subject, the softer the light. The sun is enormous in absolute terms, but it is so far away that it subtends a tiny angle in the sky - which is why midday sunlight is hard and harsh. An overcast sky turns the entire cloud layer into a massive diffuser, producing the soft, even light that portrait photographers often prefer.
“The most important thing is that the light feels right - not technically correct, but emotionally true to what the image is trying to say.”
— Gregory Crewdson, American photographer known for elaborately staged, cinematic large-format images
In studio settings, photographers move a softbox closer to a subject to increase effective source size - and softness. The same logic applies outdoors: a subject placed near a large, bright wall benefits from the soft, reflected fill that wall provides. This relationship between source size and light quality is one of the most transferable concepts between studio and location work, and it connects directly to how cinematographers make similar decisions - as explored in our look at what cinematographers actually do.
Color Temperature and the Emotional Register of Light
Light has color, even when it appears white to the naked eye. Color temperature - measured in Kelvin (K) - describes this: lower values (around 2,700-3,200K) produce warm, amber tones associated with candlelight and tungsten bulbs. Higher values (5,500-6,500K) produce cool, blue-white tones associated with overcast daylight or shade.
Photographers can set their camera's white balance to neutralize these shifts, or they can lean into them intentionally. A warm late-afternoon scene carries emotional associations of comfort and nostalgia. A cool, bluish interior reads as clinical or isolating. These color choices work alongside compositional decisions - and alongside the principles outlined in our piece on color theory without the art school jargon.
Putting It Together: Ratio, Fill, and Intentional Control
Professional photographers don't just manage one light - they manage relationships between lights. The lighting ratio describes the difference in intensity between the main (key) light and the secondary (fill) light. A low ratio means both sides of the subject are similarly bright, producing an even, commercial look. A high ratio means the shadow side goes very dark, creating drama and contrast.
Even photographers working entirely with natural light can control this ratio: a reflector bounces light back into shadows, reducing contrast. Moving a subject deeper into shade while a bright window remains behind them increases it. These adjustments don't require expensive equipment - they require understanding what the light is doing and making deliberate choices in response. That intentionality is what separates images that feel considered from images that feel accidental, and it connects seamlessly with the compositional vocabulary explored in visual composition terms every art lover should know.